Showing posts with label craft center. Show all posts

Monday, January 17, 2011

pegboards

I love everything to have a place. And therefore I love pegboards. I've always wanted one for organizing regular tools as well as crafty tools ... and thanks to Peter still having a few days off after we returned from our trip, I'm in the process of getting them installed for both the tool area and the craft center!

In the tool storage area of the basement, the pegboard will start at the height of our "workbench" (an old desk) and go to the ceiling. And in my craft center, I'm getting a floor to ceiling, 3-foot wide section, which will be perfect for tool storage/display as well as art display (since the basement walls are concrete so it's difficult to hang much else).

I can't wait for the installation to be complete so I can get in there and organize... unfortunately I'm totally swamped with work after our vacation and have another trip coming up at the end of this week (work, not pleasure, this time). So I'm not going to be able to fit in a whole lot of organizing, much less crafting, any time soon.

Instead I leave you with some fabulous pegboard inspiration:

from Canadian House & Home via LGN - I've seen those little canisters at Ikea

from BHG - I think I need a spool rack like that for my new machine!
Also BHG - the paper-covered tin cans are a great idea
Also from BHG - so clever to use a painted mailbox to hold greeting cards

wrapping center from Martha

More from Martha

And a tip - if you're doing a smaller board, look for leftover scraps from other peoples' projects at the hardware store. We're sort of piecing ours together, so we were able to get two pretty good sized remnant pieces for $1 each...

Thursday, January 6, 2011

get organized - craft center

Since I'm supposed to be busy packing for vacation as well as running errands, cleaning the house, working, and taking down Christmas decorations before we leave on Saturday, I'm of course instead organizing with Domestically Speaking's month-long assignments.

Domestically Speaking

This week's assignment is to tackle a storage area - I would say my basement craft center counts in this category, and this is what it looked like after making Christmas crafts and unpacking (i.e., dumping) from Christmas in Michigan. Yikes.

I have lots of projects I want to get started on when I get back from Mexico, so now I'll be ready to go - since I actually have access to the table! - and be able to get back to posting crafts.

the floor is visible again! everything back in its place and a bunch of things
moved to a garage sale pile on the other side of the basement.

new sewing machine eagerly awaiting my return from Mexico...
some essentials that live on the table on my adorable $5 Ikea tray
a home for everything makes me happy

(Oh, and in further shirking of necessary to do items: I've also already done next week's assignment, kitchen spaces, which will post over here while I'm gone next week...)

Sunday, November 7, 2010

craft center

I started with some striped wall and painted furniture inspiration, and lo and behold, I've schemed up the transformation of an unfinished basement corner into a cozy little craft center... By repurposing old furniture and raiding the paint leftovers from the rest of the house, I even did it on quite a budget.

First things first, I cleared out the odds-and-ends storage from the space, scrubbed down everything, and vacuumed up a bunch of cobwebs from the ceiling. We have quite a clean unfinished basement, but it's still a basement.
basement corner, before

I bought some serious primer just to seal off the walls a bit, and then all the stripe colors are also done with leftover paint from other rooms. I took one of my favorite inspiration pictures and turned the stripes to vertical, as those are easier to tape out straight (shorter lines!), and I must say I was quite pleased with myself for coming up with a pattern that required taping only once.

First, I measured out where the lines would be and then penciled them onto the wall using a level as my straightedge. Then I taped off the two-inch white lines (would have been easier to use 2-inch wide painter's tape, but I had the 1-inch stuff around, so I just did two strips next to each other), and then pressed it all down with a putty knife. After all that, it was on with the paint and then off with the tape. It did require a bit of touch up as the unevenness of the concrete walls allowed a little paint to seep under the tape, but overall, it wasn't so difficult.

tada!

The table was something we had in our old apartment, repainted to fit the new color scheme with paint I already had, and the chairs from our old apartment happen to fit nicely with scheme as is. The rug was an inexpensive find at Ikea, as was the hanging light ($5 for the shade, $3 for the cord!). I also brought in a floor lamp that we weren't using anywhere else since the basement lighting isn't great.
table, pre-makeover

table and chairs, after, with my Martha Stewart
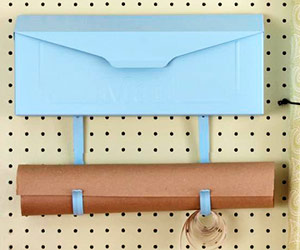
holiday idea magazine ready for action


And for storage of all my supplies, I used several inexpensive shelving things that used to be in our closet, and I got one more (with doors) on sale at Target, plus the wacky wooden shelves that somebody built in the basement years ago. I'm planning to put up a peg board as well for some additional storage space - scoped out for about $6 at the hardware store.
store the pretty stuff on the open shelves; baskets
of additional supplies go inside the cupboard


I think I spent about $75 on the whole thing, and it was quite fun to scheme up and do. Of course, there's danger of spending a lot more $ on craft project supplies, now that I have a place to work!

[shared here]

Tuesday, November 2, 2010

craft table

Recently my friend Becky posted about a trend she's loving: chevron. I loved the inspiration pieces she shared, and since I've lately been thinking about repurposing with paint and setting up a little crafting area, this project, via Bower Power, really caught my eye:

[photo from Bower Power]

So, I thought, why not do up my old lime green table?!

I love the chevron pattern and almost went with that, but since I'm doing striped walls, I didn't want things to look too crazy and patterned. So instead I decided to just go with a simple border.

The best part of this project, besides how fabulous it looks, is that I did it for FREE. I just looked through the various paint cans we had in the basement and decided to do the overall color with the slate gray, of which the previous owners left at least half a gallon after painting the basement floor with it. So that ties in nicely with the floor, and then since I love yellow and gray together, I used the leftover Martha Stewart "Cornmeal" from our kitchen for the lines. (Not to mention that this was a repurposed table, which I originally got at Ikea for about $40 about 5 years ago.)

gray paint on and taped up for the border

Very simple, but now the table is a bit more sophisticated from the old lime green look, and it goes with its new room (striped walls to be unveiled soon). Also I kind of like how it looks like lines of yellow tape.

finished product

Wednesday, October 6, 2010

stripey walls

I love a good geometric pattern, including any and all stripes - and striped walls are fabulous (see some great examples here, which got me thinking...). But I'm not sure striped walls are really the style of the rest of my house. So what better place to have some fun with this than with my newly conceived basement craft area idea?! Plus, I can try it out for free with the various leftover paints from the rest of the house, so not too big a deal if I don't end up happy with it.

I love something like this classic stripe in the 2008 HGTV Dream Home via The Inspired Room and also the very sophisticated bathroom from Young House Love, but I'm thinking something a little more fun for the craft area - maybe varied width stripes. Plus, that's a better way to use more than two colors, which I kinda need to do because I'm using paint leftovers of varying amounts.
So I did a quick Google Image search for striped walls and picked out a few inspirations for multicolor/varied widths:Don't like the colors, but I like the pattern idea
(from This Old House, complete with tutorial).

Here's a different take - actually a wallpaper.

I like this - fixed width, but three colors (source).

My favorite stripe pattern so far (source).

Ooh, but I also love this one (source).

So I'll be mulling over these and trying out some tape on the wall. I'm also working on another craft area project with leftover paint, so stay tuned! I've been scheming....

Tuesday, September 28, 2010

copy-craft corner

I've always loved the idea of craft centers, especially since seeing Rosie O'Donnell's featured in her magazine when I was in high school. My mom and I created our very own craft center on one end of the basement with cabinets and shelves and a crafting table, which I promptly filled with all the supplies of my many obsessive craft phases: decoupage, mosaics, paper-making, etc.

I miss the craft center. And I still love them and am always scheming about how I can get myself one. I had a little corner of the living room in our apartment when we got a new dining table, which was nice. In the new house, the extra bedrooms are serving as an office and a guest room, but our unfinished basement is clean enough that I think I could turn a little section into a craft area. These inspirations would suit my requirement for beauty and utility.

from Martha

from Good Housekeeping - lots of Ikea items here

from LovelyDesign - love that this one is tucked into a closet

from flickr
I don't really know how to sew, but I want that spool rack!

(fancy enough to be called "studio", actually)
Related Posts Plugin for WordPress, Blogger...