Showing posts with label 12 days of christmas crafts. Show all posts

Tuesday, December 14, 2010

12 - outdoor decorations


So this is not much of a craft per se, but I did get all the items at a craft store (Hobby Lobby half off, what else?!)... here's my outdoor decorating for this year.
To combat all the over-the-top decorators in my neighborhood (of which there are many), I kept it simple and classy with oversized ornaments - to which I attached ribbon and tacked up behind the porch lintel. Then we just did some lights on the banister and my wreath on the door.
I like that the lights give us some night-time festivity but that with the ornaments, there's also daylight fun.

Here are some other classy outdoor decorating ideas that I might consider for future years:

Monday, December 13, 2010

11 - poinsettia pillows


There was a brief hiatus from Christmas crafting over the weekend as I was busy Christmas partying.... but now I'm back with day 11 - simple throw pillow holiday embellishments.
Supplies:
  • Pillow cover
  • Felt (I used the 29 cent sheets from Michael's, needed about 7-8 of them)
  • Glue gun
  • Pins
I took my inspiration from Centsational Girl but varied the assembly method from her tutorial. I don't have a sewing machine, so instead I cut out the leaves (about 12 bigger sized, 8 smaller sized) and then arranged/glued them to a felt square base.
After gluing a felt circle to the middle to cover up all the meeting points right there, I attached the whole thing to my pillow cover. If you had a sewing machine, you could make your own, but I'd recommend going the $6 Ikea pillow cover route any day... I was going to hand stitch my flower to the pillow, but I started scheming other seasonal embellishment ideas as I was making the flower, so instead I glued two pins to the back of it and simply pinned it to the pillow cover, and now the pillow can be reused/redecorated throughout the year.
Here's my next one in the works...

Friday, December 10, 2010

10 - pretty packaging


Every year I like to pick out a fun new roll of wrapping paper and wrap all of my gifts with it. I just love a uniform-looking pile of gifts.

2008's red and white dots th
eme (the white boxes even have polka dotted ribbon!)

this year's pile wrapped in Ikea paper with handmade tags and gold cord - so far! still shopping...


Here are some great ideas for wrapping that I've seen around (and don't forget to finish off your pretty packages with some fabulous tags!):
  • If you still need to find your great roll of wrapping paper for this year, check out the round up at Creature Comforts.
  • If you're doing any baked goods, I love these doily decal tins (below) from Martha.
  • For long/thin things like bottles - mailing tubes made to look like yule logs from Martha.
  • Fun monogram stamped white paper from Good Housekeeping.
  • Adorable shirt-wrapped box (above) from Country Living.
  • And if you're in a recycling mood, here's a great idea for using things like cereal boxes from Blah to Tada.

Or just go to one of my very favorite stores - the Container Store - and ooh and ah over all of their rows of boxes and bags and paper...
the little boxes on these windows would be great for showcasing baked
goodies... and of course there are lots of options for embellishing these guys!

these don't even need wrapping paper, they're so cute

lots more options for your baked goods or bottles and the like

Thursday, December 9, 2010

9 - felt flower wreath

Before I knew about the church wreath making event, I had already wanted to make my own wreath, and I decided to do a felt flower wreath after seeing lots of great fabric flower project ideas on various blogs.
Now be warned that this is a slightly crazy idea because you need to trace/cut out about a zillion flower shapes and then make about a million flowers with them before gluing everything onto the wreath form. But it's fun...

Supplies:
  • Felt (I really have no idea how many of those little felt sheets from Michael's I used. Good thing they're only 29 cents.)
  • Flower template
  • Scissors
  • Hot glue gun & lots of glue sticks
  • Wreath form (mine's from the dollar store)
As mentioned, you need to start out by cutting out the shapes and making a whole bunch of flowers. Here are the two tutorials I looked at, where you can get the template for the flower shape and the instructions: Jones Design Company and Tatertots & Jello.
Then I just glued them around the wreath form until I was happy with how everything was filled in. I also added a couple red flowers for fun.Quick description, but it really did take some time to get all those flowers made... put in your favorite Christmas movie and do your cutting in front of the TV would be my suggestion!

Wednesday, December 8, 2010

8 - gift tags


When I have time, I like to make a little something fun for tags on my gifts. Last year I frosted some gingerbread ornament cookies for tags on my nephew's gifts. The tags were more of a hit than the gifts at the time...

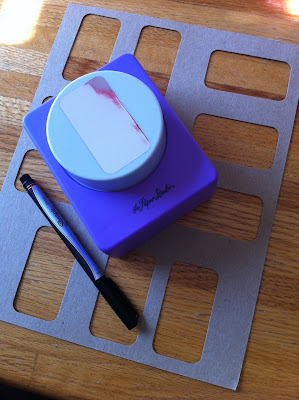
This year I used my rounded rectangle punch to make my own tags out of some thin cardboard (repurposed from the backing of a notepad), and then I just took my red Sharpie pen to them. Usually I'm too much of a perfectionist to do a hand-drawn look, but I think they're kind of fun and look good with this year's Ikea wrapping paper, so I'm going with this simple approach.

If you just want to print some cute paper tags, here is a roundup of some fabulous printables:
I tied them on with the leftover gold elastic from my ornament making.

Tuesday, December 7, 2010

7 - holiday napkins


Here's an easy (and environmentally friendly!) way to make your table festive - embellished cloth napkins.

Supplies:
  • Cloth napkins
  • Iron-on printer transfer sheets
  • Computer/printer
  • Fun font (there are lots of great free downloads, such as here, here, and here).
  • Iron
All you need to do is design a little phrase/word image with your font - I went with "merry christmas to all"; but you could do any holiday-related words (peace, love, joy, happy holidays, etc.). Then duplicate so that you have one for each napkin, and print. (I practiced printing on regular paper first to make sure I liked the size/color before using up my special iron on sheets.)
fonts from here

Follow the directions on your sheets for ironing on, and you're done!

I have all white dishes, so I love to put colored/seasonal serving dishes, placemats, and napkins with them. Here's my holiday table so far:
The napkins are from Target; the 4-packs were on sale for about $6. And the print/iron on sheets are from Michael's, also $6ish I think, but less with a 40% off coupon, of course. These could be a fun little gift, maybe for a hostess.

Monday, December 6, 2010

6 - evergreen wreath


The church we've been going to had a wreath-making event, so I was excited to have access to the greenery and some instructions to learn how to make my own Christmas wreath.

Basically, you just start out with a pile of greens - here's the size pile they had for all of us:

Then, using these pins, arrange and attach the greens to the straw wreath form.

There are lots of techniques/approaches according to how you want the wreath to look, but we joked these had a lot to do with personality. The organizer of the event guessed that I was a type-A perfectionist right away...

The technique I came up with was to cut the greens short before attaching, and then to work around in a spiral (everything pointing the same direction). When I had the main part covered, I made sure the center and sides were covered and that the shape was uniform over all, adding additional pieces where necessary.

I also attached a couple pinecones and some greenery that had some red berries with wire at the end.

Sunday, December 5, 2010

5 - "ginger" cookies


You'll perhaps have noted that since it's my first year with a house, and my first year with a dog, that it's pretty much all about them - and so this year I turned our traditional family Christmas cookies into "Ginger" cookies (see, it's a joke - they're sugar cookies, not gingerbread, but they're in the shape of Ginger... funny only to me?).
I may be biased, since I grew up making/eating these cookies for Christmas (and any other holiday my sister and I could get my dad to roll out some dough for us), and the recipe comes from my mom, from her mom. It just isn't Christmas without these cookies.

Here's the recipe:
  • 3c flour
  • 1/2t baking soda
  • 1/2t baking powder
  • 1c butter
  • 2 eggs
  • 1c sugar
  • 1t lemon juice
Sift flour, powder & soda; on low speed of mixer cut in butter until mixture resembles cornmeal. In separate bowl beat eggs, add sugar & lemon extract and beat thoroughly. Blend egg mixture into flour/butter mixture until it forms a ball of dough. Chill dough, then roll, cut, and bake at 375 for 6-8 minutes.

For frosting, we always just used powdered sugar and milk - add milk in very small amounts to powdered sugar until you get a good consistency for spreading. Of course, add food coloring as desired.

When I make these with my family, we always decorate them with sprinkles, but I needed to make my little Gingers look holiday-related:
A couple tips on cookie making and decorating:
  • Sur La Table has an excellent cookie cutter selection (that's where I got the lab one), and they're inexpensive, so you don't have to feel bad stocking up for Christmas and other occasions.
  • To keep the frosting really tidy, it helps to pipe the border on first, then when it's set a little bit, use a knife to fill in the rest.
  • To get a real red frosting color, you need gel food coloring, available at Michael's/Hobby Lobby. Start out by making the frosting pink, and then you won't need to add as much of the red color (if you don't, you could end up using the whole jar of red to get the intended color!)


Saturday, December 4, 2010

4 - puppy decorations


Now that the house is festive, here are some ideas to make the dog festive!

I saw this collar at PetSmart earlier in the week, but they only had large sizes left that were too big for Ginger. Luckily, I've been working on some projects that involve similar flowers, so I made my own!
I just used a green felt flower from my other project, glued a bead in the middle, and pinned the whole thing onto a $3 red collar from Target.Of course an even easier festive look is a bow... I just glued one onto a pin and put it on the same collar in place of the flower.

She's a very tolerant puppy :)

Friday, December 3, 2010

3 - paper globe ornaments

Since it's the first Christmas in our house, I've had quite a few decorations to buy: I got some things for the outside and also stockings - now that we have a mantel! I also came back from Thanksgiving with an artificial tree that my mom was not planning to use (thanks, mom!), but I don't really have a lot of ornaments around since we never had a full-sized tree in our apartment. I didn't really want to spend any money on tree decorations, especially since I know as soon as my mom reads this, she'll be packing up all my childhood ornaments to send home with me on my next visit, so I decided to go with some easy paper globe ornaments.Supplies:
  • paper cut into strips of various lengths - I used various reds; in the inspiration project, Martha recycled holiday greeting cards
  • hole punch
  • paper fasteners
  • festive string/cord for hanging
All you need to do is punch a hole at both ends of the paper strips, attach the fasteners, and fan out to make a globe. You can vary the number of strips depending on how much space you want between them. On the ornaments made from longer strips, I did 15-18 strips, and on the shorter ones, I usually did 10-12 strips.
I cranked out a whole bunch of these sitting in front of the TV and then wound some gold elastic cord around one of the fasteners on each to make a loop for hanging.

I love all the sentimental ornaments (made when I was young, given to me throughout the years, etc.) on the tree at my parents' house, but I'm also a big fan of a uniform look when it comes to tree decorating, so I'm quite pleased with how this turned out. And it really was inexpensive - most of the paper I had on hand but spent maybe $2.50 on some more, about $2.50 on the fasteners, $2 on the gold elastic cord for hanging, and $8.50 on lights (buy one get one free at CVS). And I have plans to make a skirt out of a $5 (half off with coupon!) tablecloth from Target...

found this fun paper at Michael's that's double sided - so you
get a little peek of red & white when you look up close.


Featured on:
Photobucket

and

Straight Stitches

Related Posts Plugin for WordPress, Blogger...